Guide to Join Domain, Disjoin Domain, and Manage Computers on AD
1. Procedure for Joining a New Computer to the Domain (Without User Data)
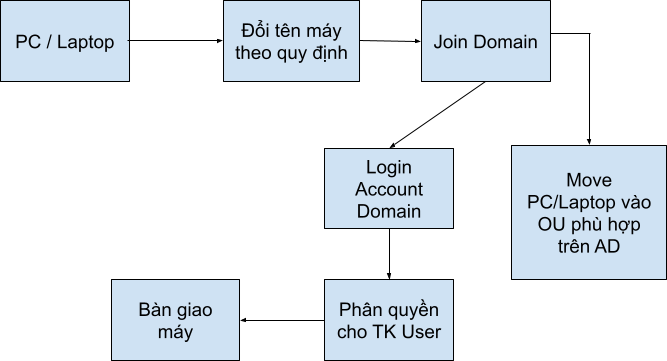
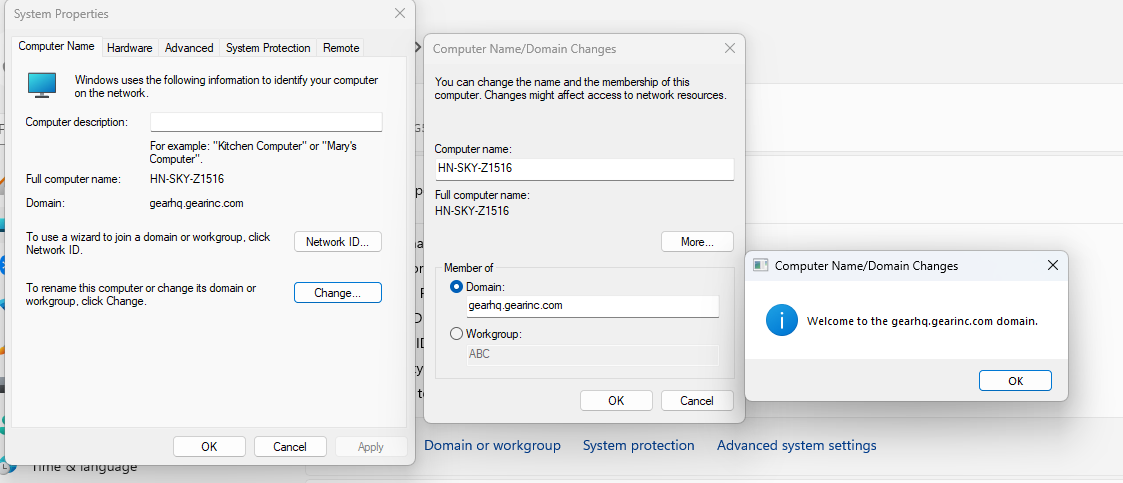
1.1 Rename the Computer
- Go to Settings > System > About > Rename PC > Enter the name.
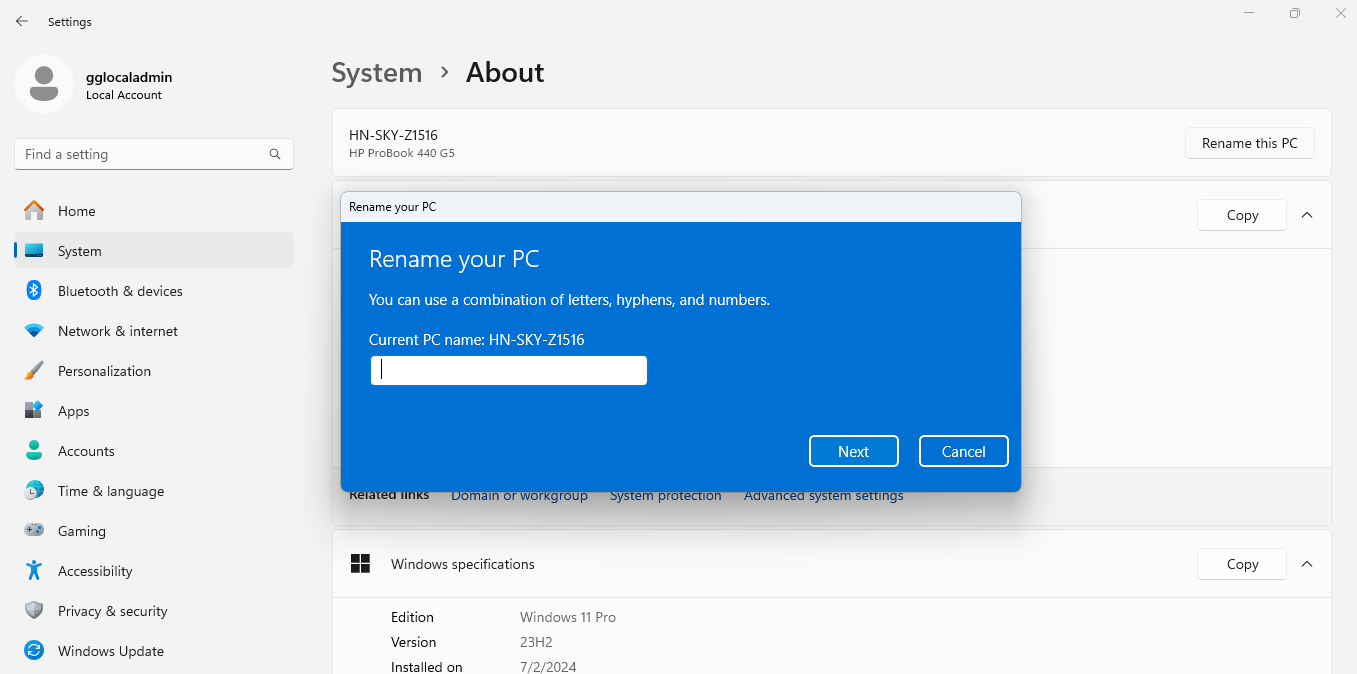
- The naming conventions are as follows:
- For Skylight:
HN-SKY-XXX - For PhiLong:
DN-PLG-XXX - For Pearl:
HCM-PEA-XXX
- For Skylight:
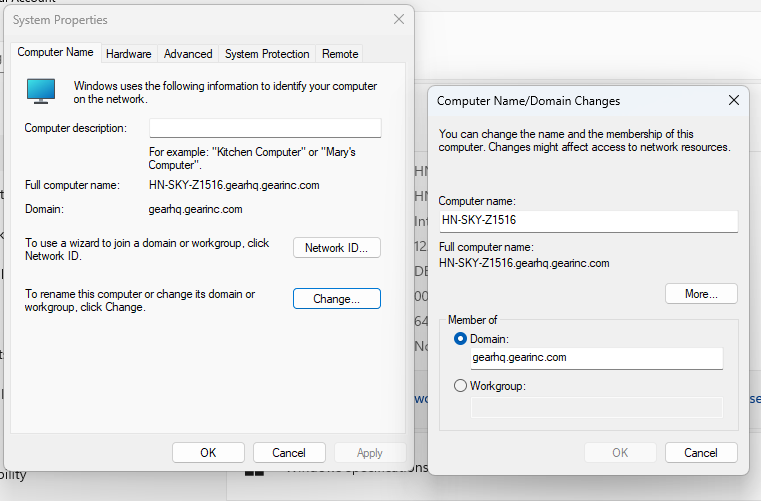
1.2 Join the Computer to the Domain
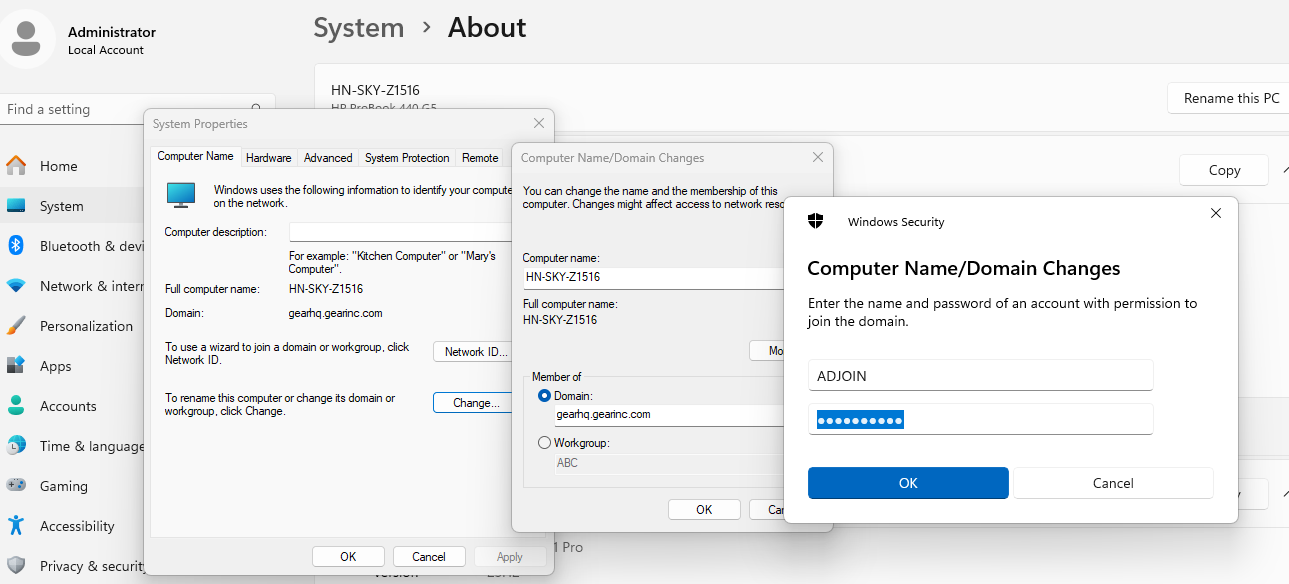
- In the Member of field, enter the organization's domain:
gearhq.gearinc.com. - The system will ask for a domain account with permission to join the computer to the system. You need to enter the domain administrator's ADJOIN account.
1.3 Move the Computer to the Appropriate OU on AD After Joining the Domain
- After successfully joining the computer to the domain, the computer will appear in the Computers section on AD.
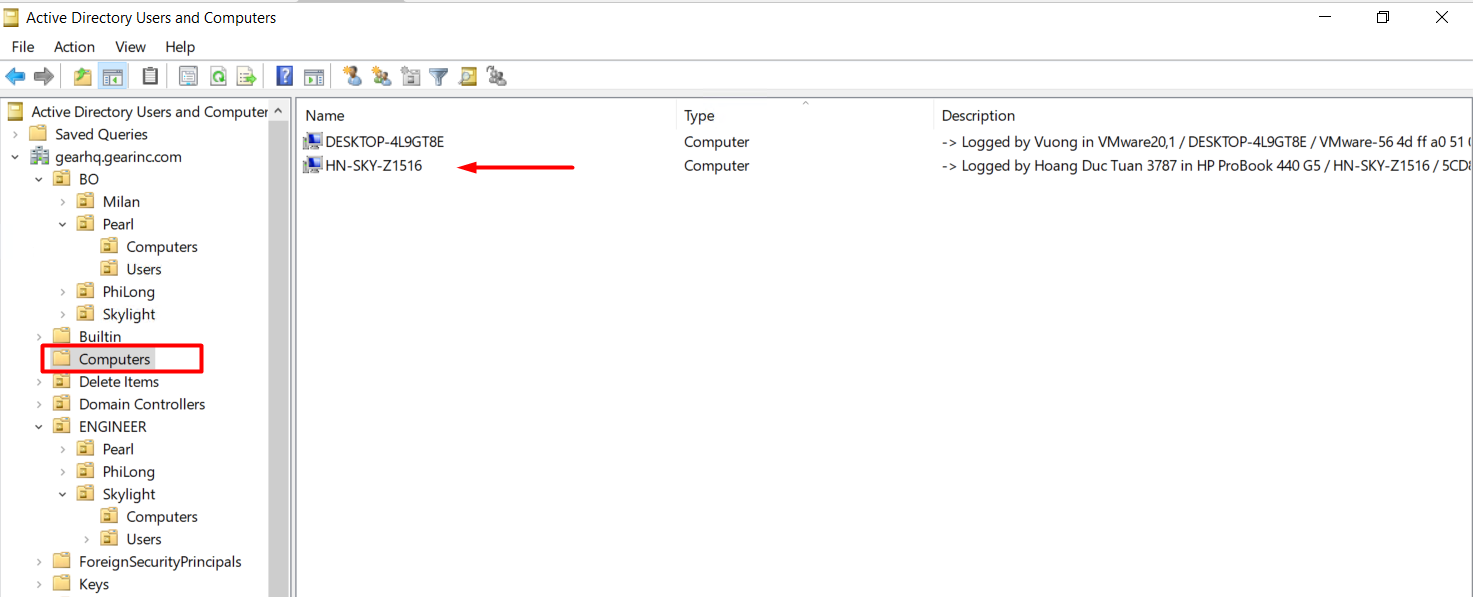
- Log in to AD and move the computer to the appropriate Organizational Unit (OU) to apply the organization's policies.
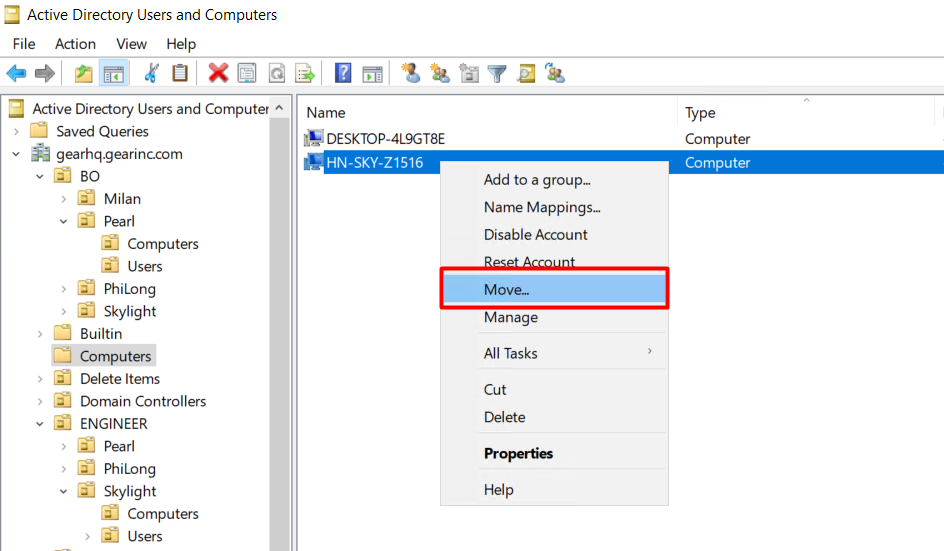
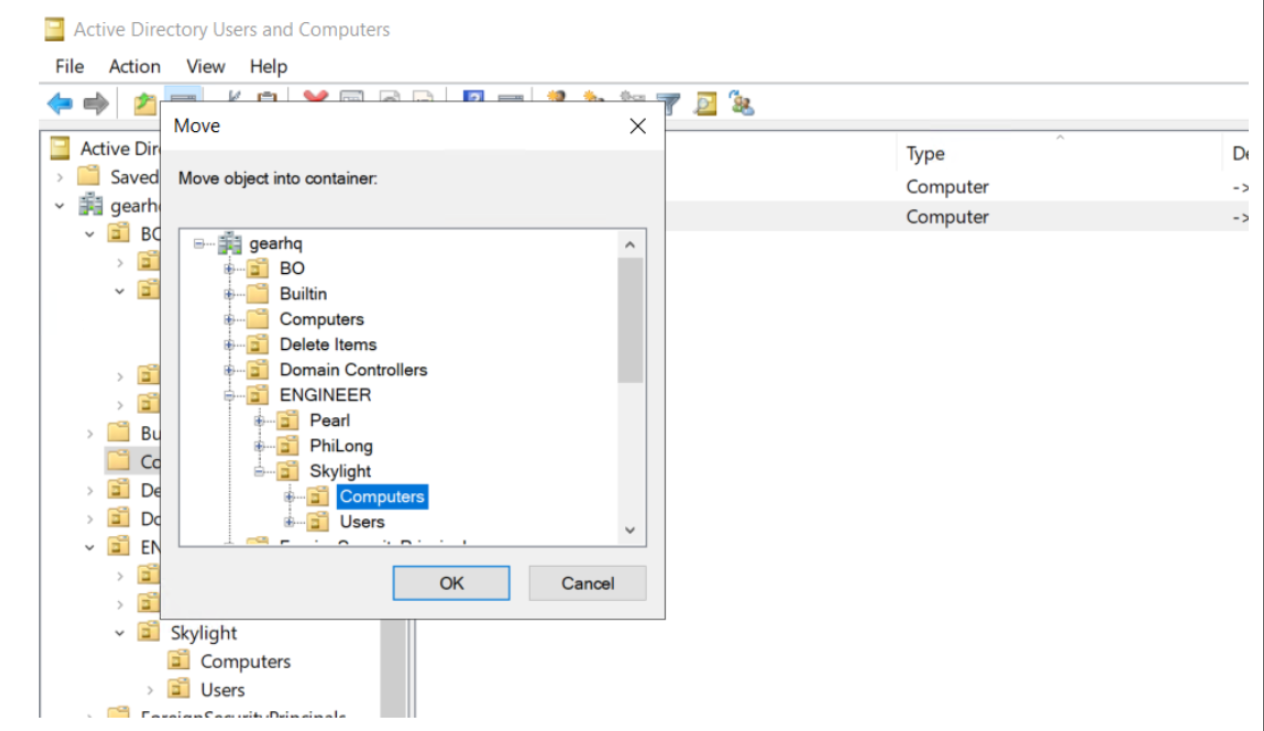
- Confirm by clicking OK.
Note: This step is crucial, so administrators must update immediately before distributing the computer to users:
- Helps organize the pre-defined partition structure.
- Ensures the application of GPO (Group Policy Object) and Security policies to the correct OUs (each OU may have different GPO policies).
- Ensures compliance with local admin account policies, making it easier for IT officers to troubleshoot when issues arise. Local Admin accounts are often “gglocaladmin” with a predefined password that is changed regularly.
2. Joining Domain for Computers with Existing User Data Stored in Local Workgroup Accounts
Note: This section applies only in specific cases (e.g., the entire organization is using a Workgroup environment and needs to transition to a Domain environment). Do not use the Profwize Tool solely for joining the domain.
For example, the user has a local Workgroup account called sgs. In the software window, choose C:\Users\sgs.
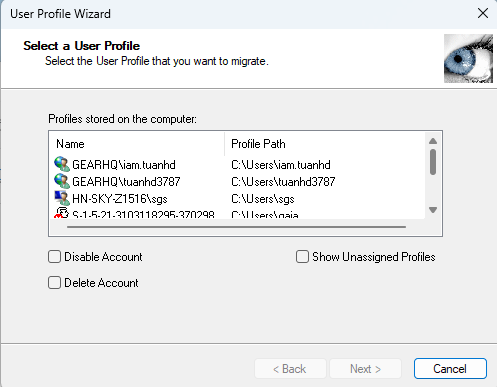
In this window, select the organization’s Domain. Enter the Profile name that the user logged in with when joining the Domain.
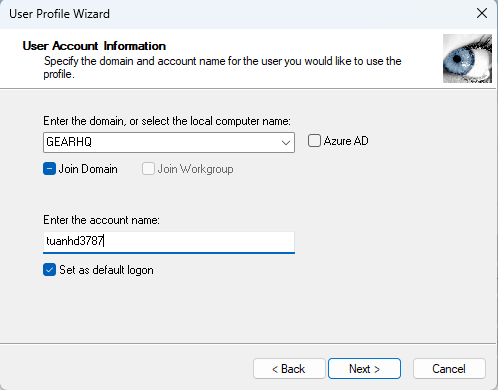
Click Next until the program begins migrating the data.