How to Update Inventory to Snipe-IT
Windows (PDQ Inventory)
Step 1: Log into AD and Run PDQ Inventory
Log into Active Directory (AD) and run PDQ Inventory, then log in with your domain admin account.
If your password was recently changed and hasn't been updated in PDQ settings, a login prompt will appear. This prompt also appears when setting up PDQ Inventory for the first time. Once you've completed the login process, the main PDQ Inventory dashboard will be displayed.
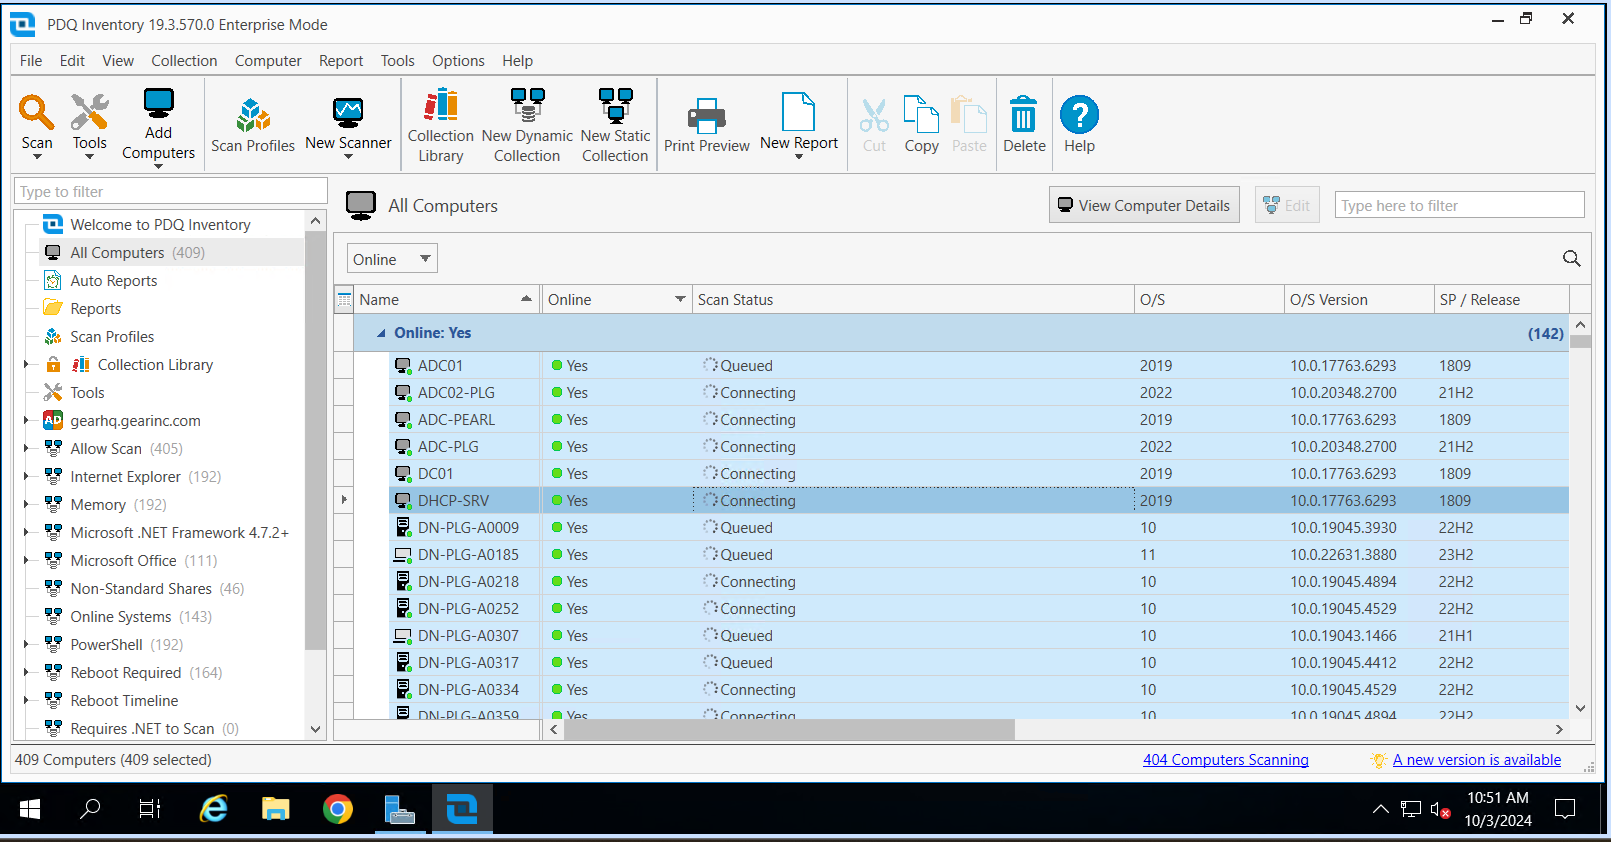
Step 2: Select All Computers and Scan
In All Computers, select all (Ctrl + A), then choose Scan >> Standard.
PDQ Inventory organizes scan types into Scan Profiles, allowing you to scan systems in the most efficient and customizable way. Each Scan Profile lets you tailor what information PDQ will collect. In most cases, the Standard Scan Profile provides all the essential data from machines that have joined the domain. However, if your task requires more specific information, you can either select a different Scan Profile or create a custom one.
Step 3: Wait for Scan Completion
Wait until the scanning process is complete.
Step 4: Transfer the Scanned Data
The scanned data from the computers will be stored in a SQLite database file (.db). You will use this file to update information in Snipe-IT. Follow these steps before establishing a remote connection to transfer the file to your local computer:
- Open the Remote Desktop Connection app.
- Navigate to Local Resources > Local devices and resources > More.
- Select your local drives and click OK to share them in your next connection to Active Directory (AD).
- Once connected, follow these steps:
- Open Windows Explorer.
- Navigate to
C:\ProgramData\Admin Arsenal\PDQ Inventory. - Copy the
Database.dbfile to one of your local shared drives, which can be accessed under This PC.
Step 5: Update Information in Snipe-IT
This repository (https://github.com/gearitorg/gearagent) contains Python code designed to send update requests to Snipe-IT. You can clone it to your local storage or download a .ZIP file to get the code. To get started, you need to create a .env file in the same directory, defining the following environment variables:
URL: The URL of your Snipe-IT instance.API_KEY: The API key with sufficient permissions to update asset information in Snipe-IT.
Next, open the db.py file. You'll find two important constants to configure:
DATABASE_PATH: The path to your SQLite database file on your local machine.REQUEST_RATE_LIMIT: The maximum number of HTTP requests sent to Snipe-IT per minute (Snipe-IT has a rate limit of 120 requests per minute, so adjust accordingly).
Before running the code, ensure Python is installed and added to your system's PATH. Then, open a terminal in the repository’s directory and run the following command to install the required dependencies:
py -m pip install -r requirements.txt
Once the dependencies are installed, run the script using the following command:
py db.py
Mac (Jamf Pro)
Step 1: Log in to Jamf Pro and Download Inventory
Log in to Jamf Pro and navigate to Computers > Search Inventory > All Managed Macs (customized). Click View to display all Macs within scope, then select Reports and download the CSV file.
Step 2: Update Information in Snipe-IT
The repository gearitorg/updatemac contains the code for updating Mac specifications in Snipe-IT. You can clone it to your local storage or download the .ZIP file. Ensure Python is installed on your machine before proceeding. Next, copy the downloaded CSV file into the repository’s directory and rename it to update.csv. Then, update the API_KEY constant in the updatemac.py file with the correct key.
Once done, run the script to update Snipe-IT assets using the following command:
py updatemac.py