Enrolling a New Mac
ENROLL a new computer or one that has not been handed over to the User.
Requirements before implementation:
- The Mac OS computer must be running OS version 13.x.x (Ventura) or higher. If the version is lower, enrollment may fail or cause errors. Reference link here.
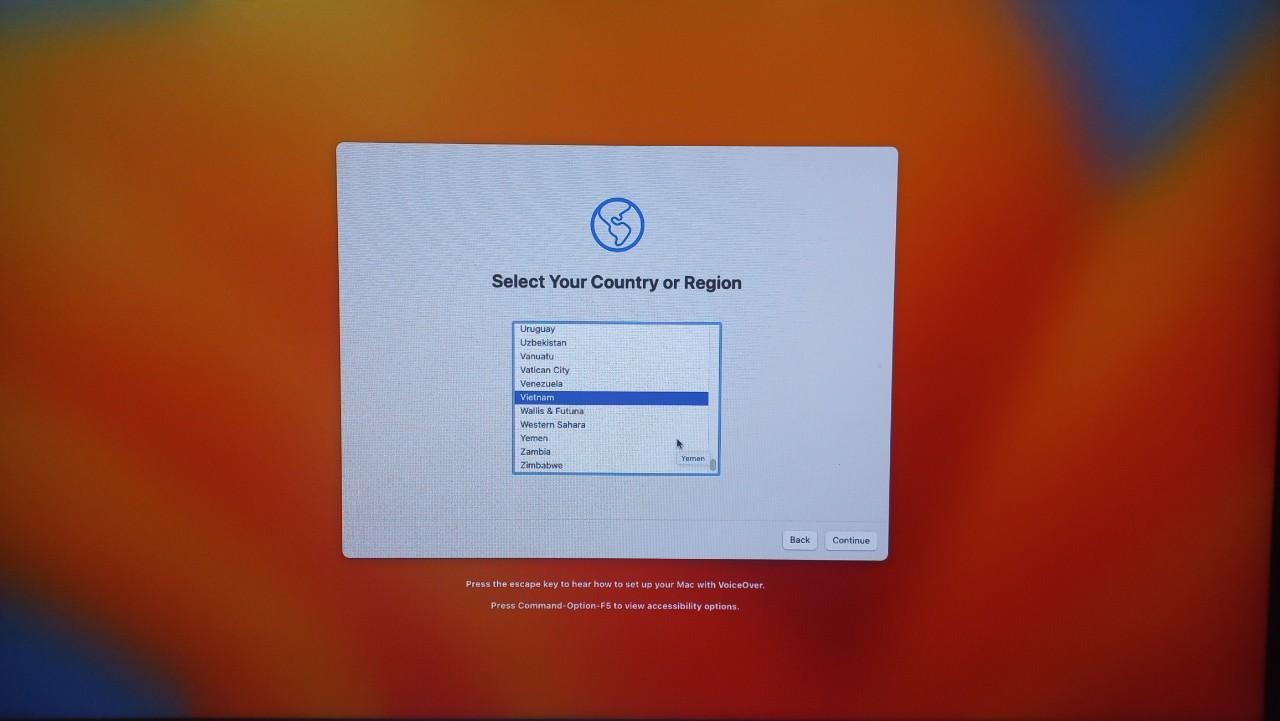
- The computer must be Erase all contents and settings to the original default. Or you can run Recovery mode to reinstall the operating system. Important note: Only stop at the step of selecting Region or Country. Then we will use the phone to scan the device.
- You need an iPhone running iOS version 16 or higher to install the Apple Configurator program.
Implementation:
Step 1: Erase All contents and Settings
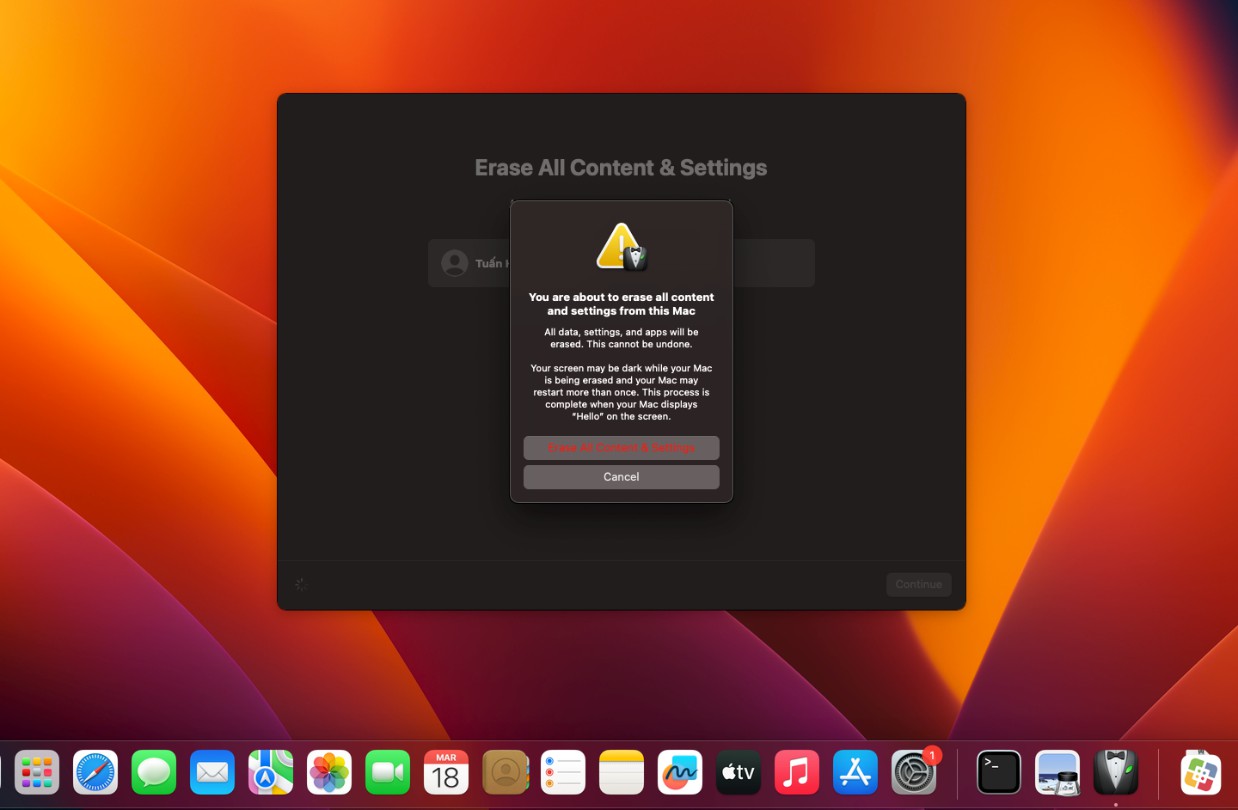
Go to System Setting > General > Transfer or Reset.
The computer will restart and erase all previous settings and return to the initial setup state. Here you need to note that only setup to the language and region selection.
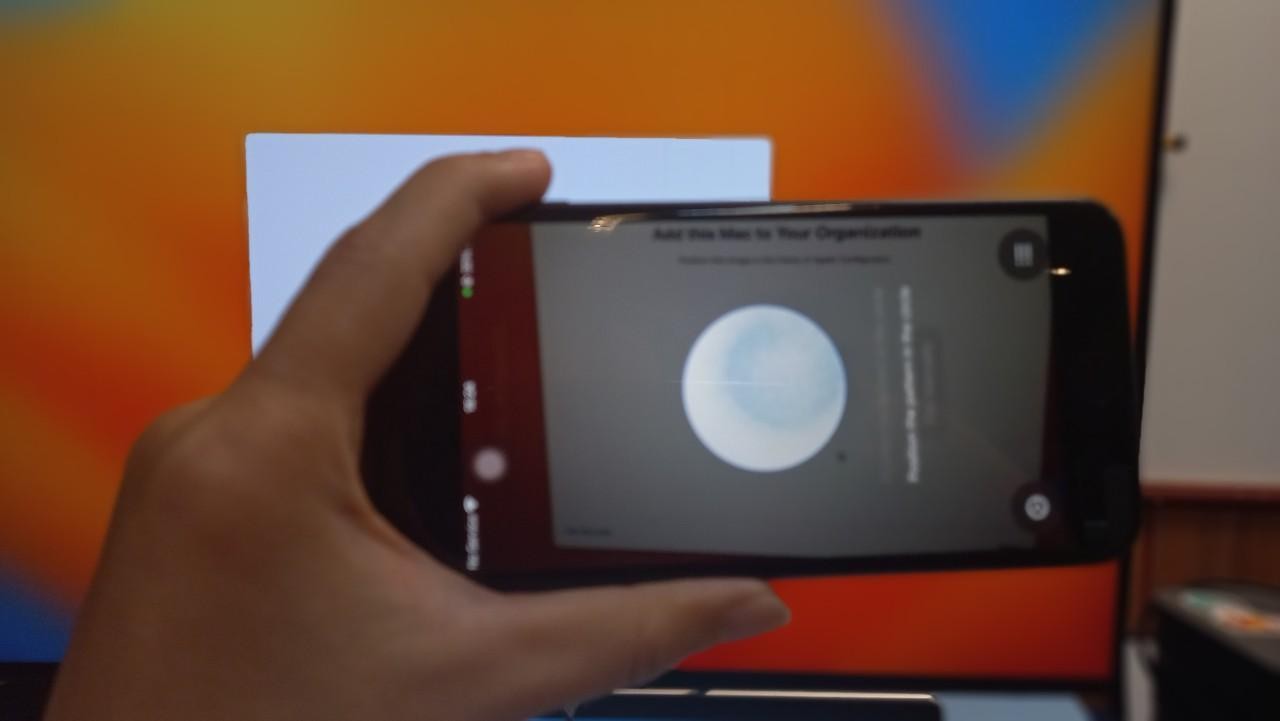
Step 2: Use the Apple Configurator software to scan the device.
- Use an iPhone with iOS version 16 or higher to download and install the Apple Configurator software.
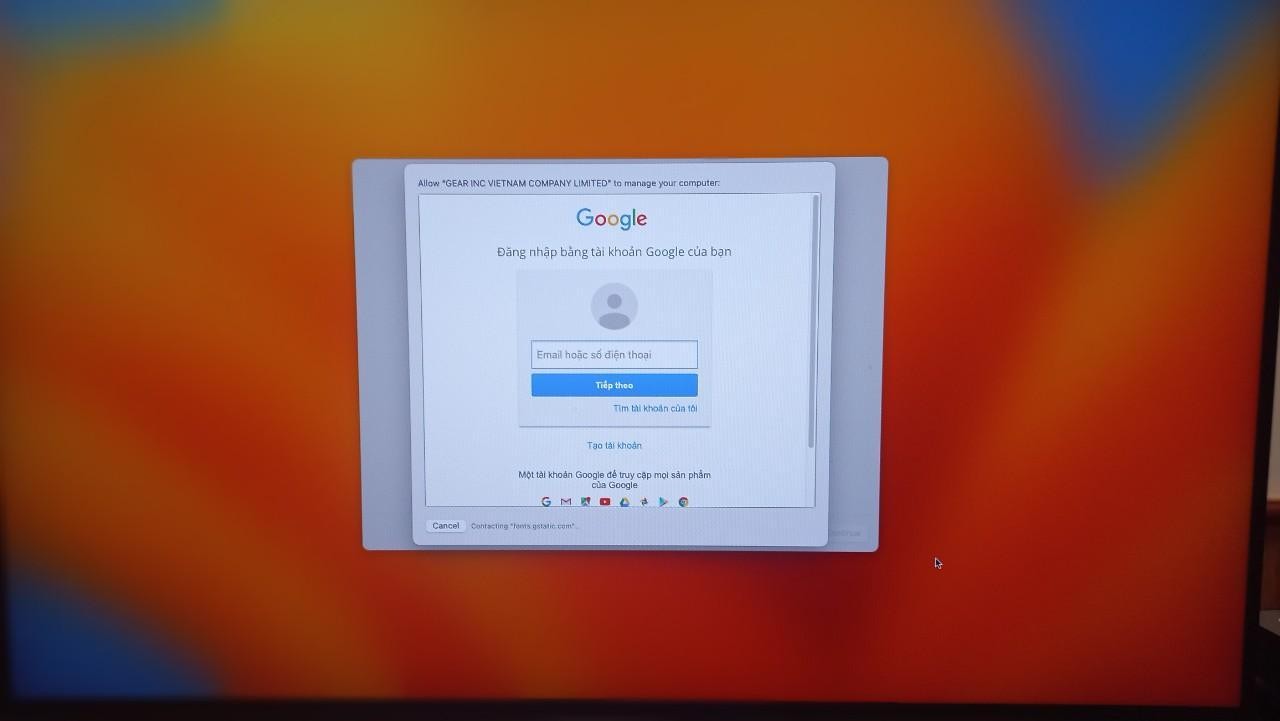
- Log in with the Business Apple management account in the software. You need to be authorized or shared access by the Business Apple manager to use it.
- After logging into the software, enable Bluetooth on both the phone and computer, and bring the two devices close to connect. At this point, the computer screen will automatically switch to the Register status. What you need to do is place the phone in the middle of the computer screen to scan the device.
The system will add your Mac to Apple Business Management.
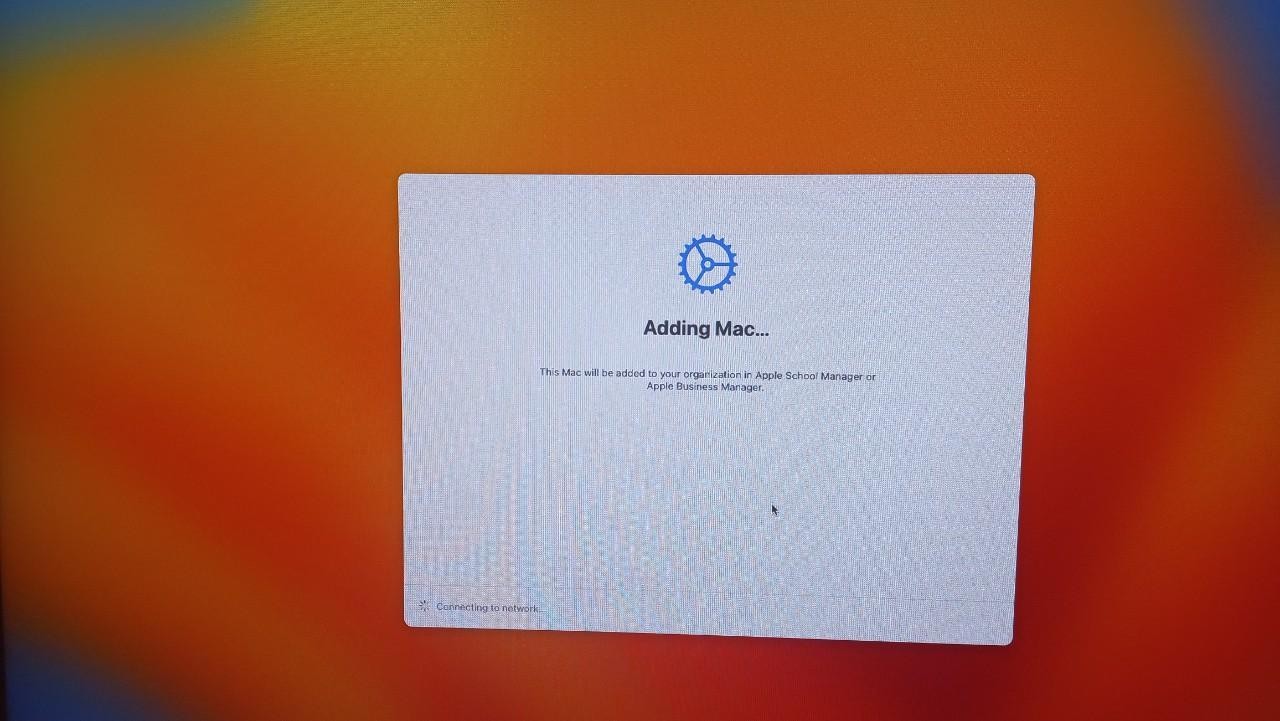
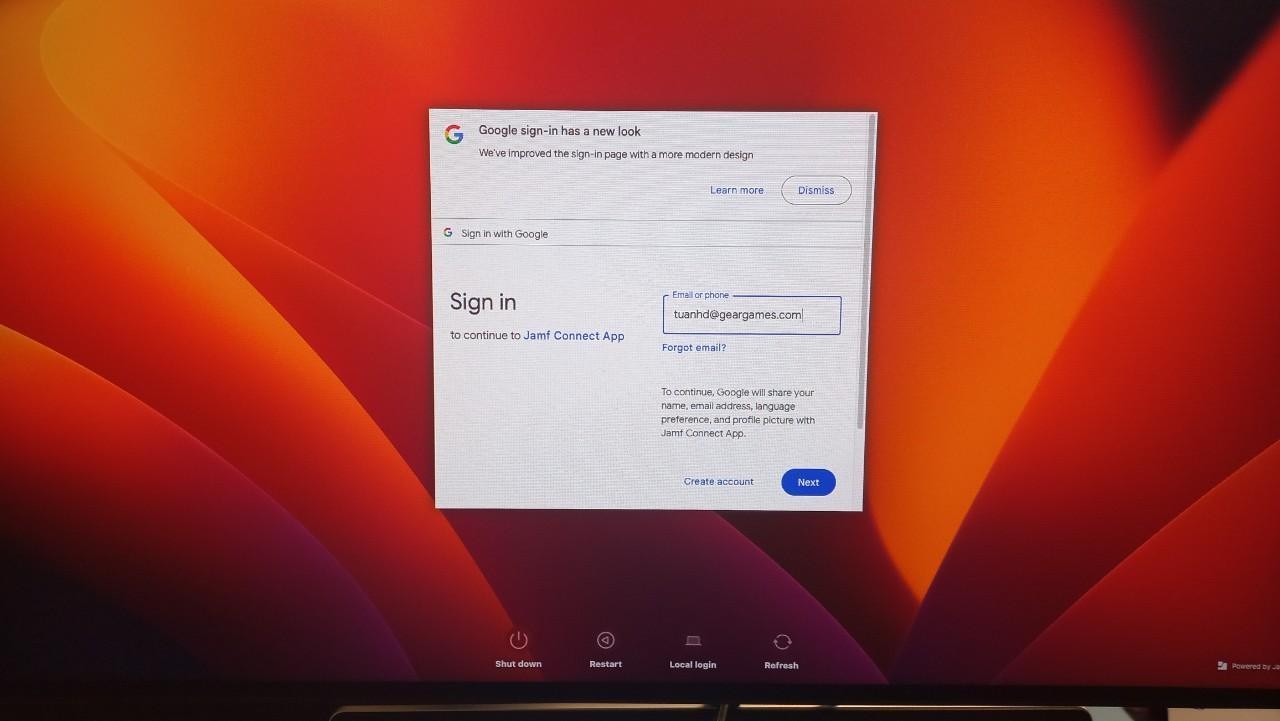
Log in with the Google Account.
The system will automatically push down the necessary installation packages that have been pre-configured.
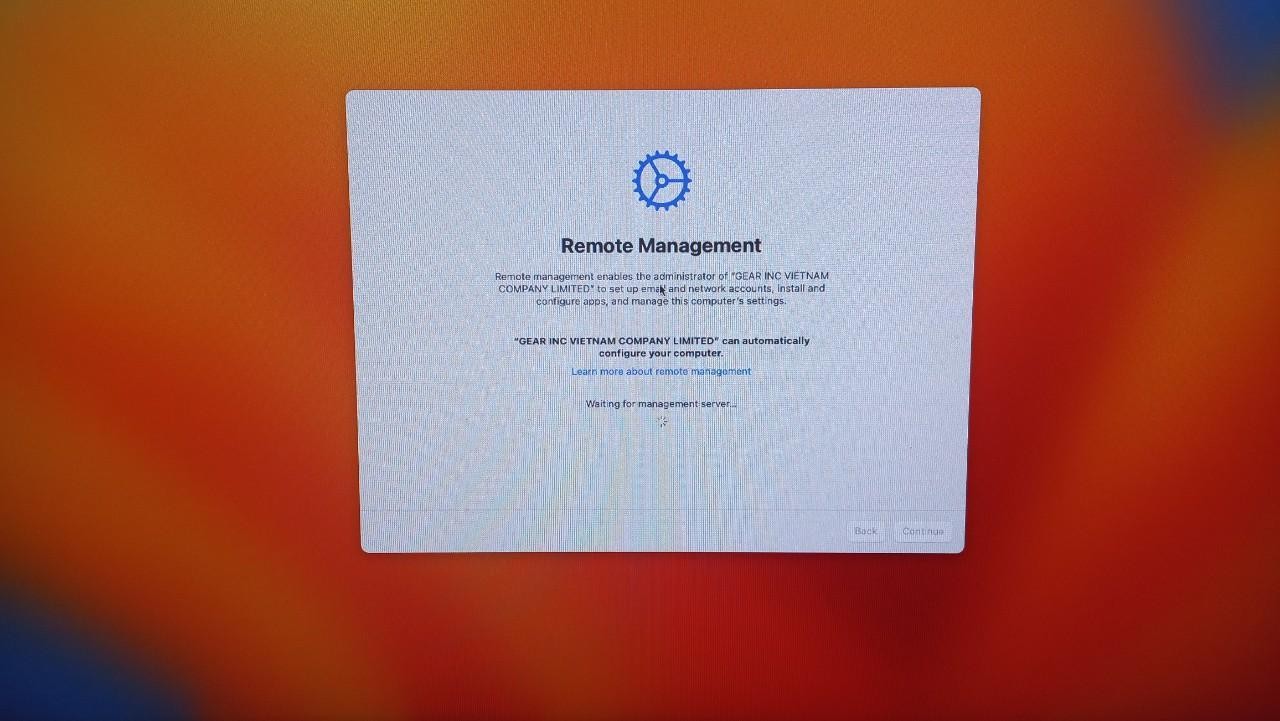
Automatically create a Google account on the Mac computer.

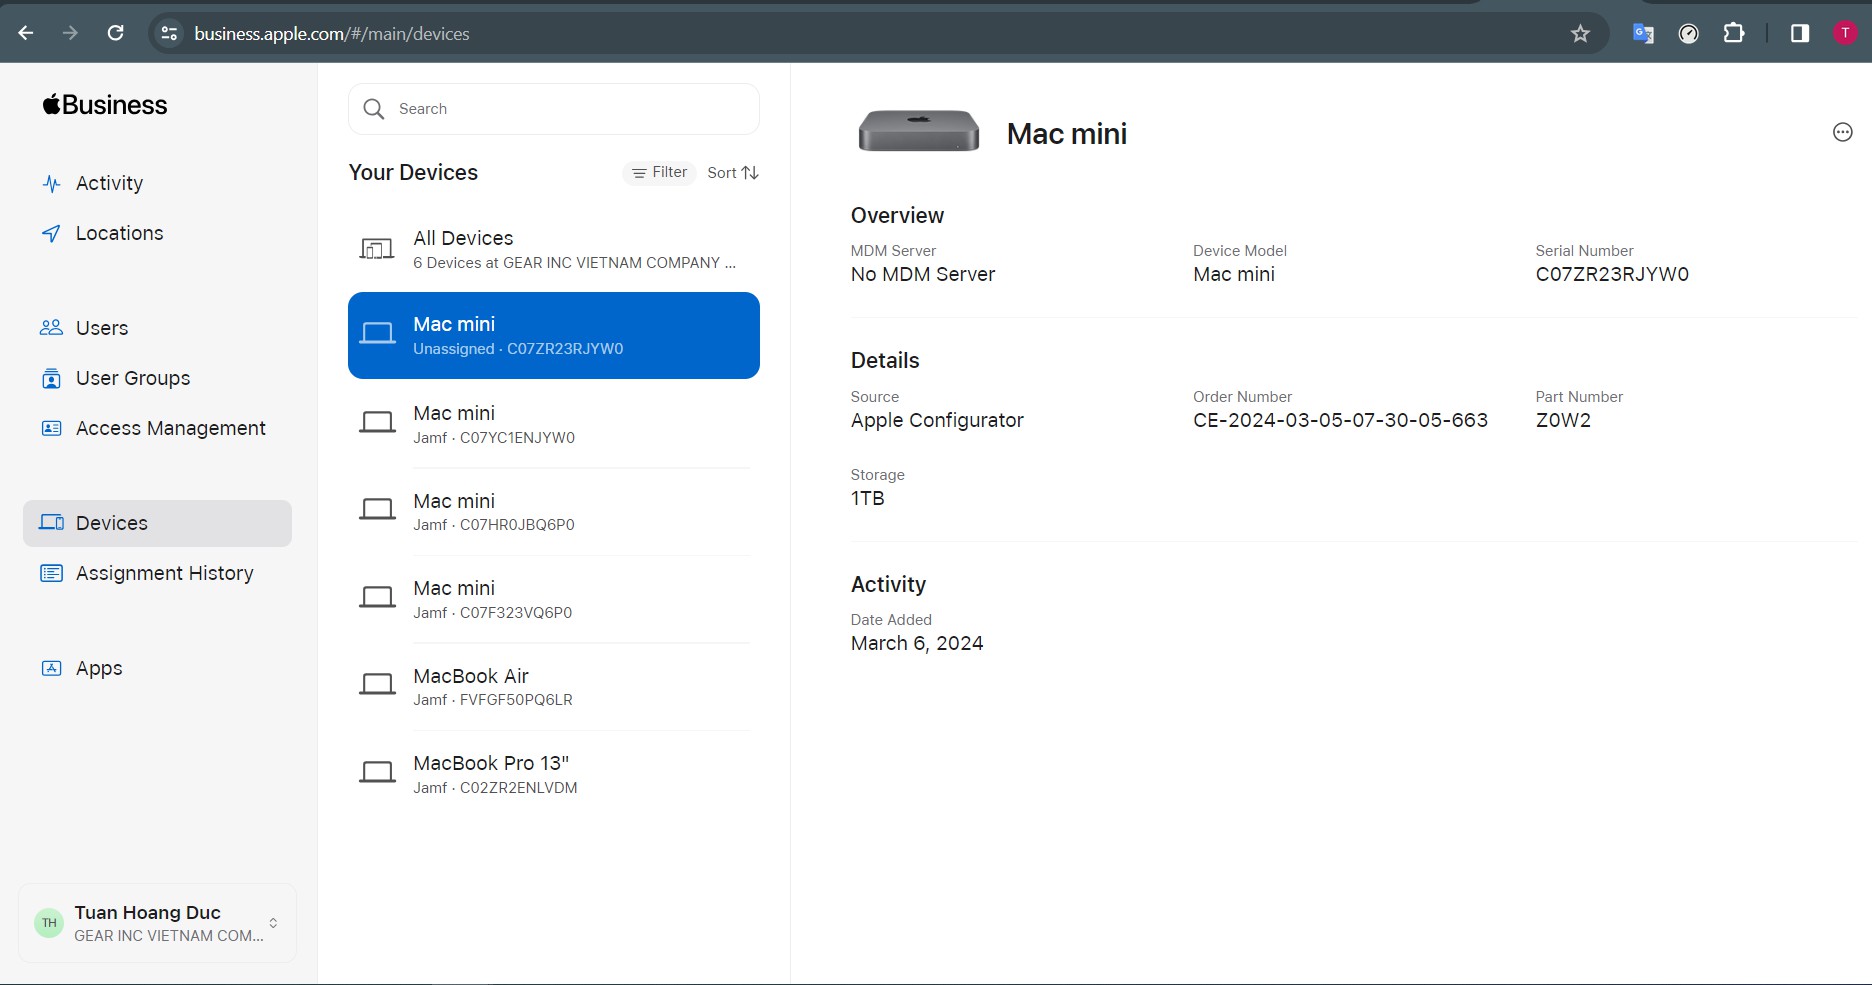
Step 3: Assign the device to the Jamf Pro zone from the Apple Business Management Portal
Go to https://business.apple.com/
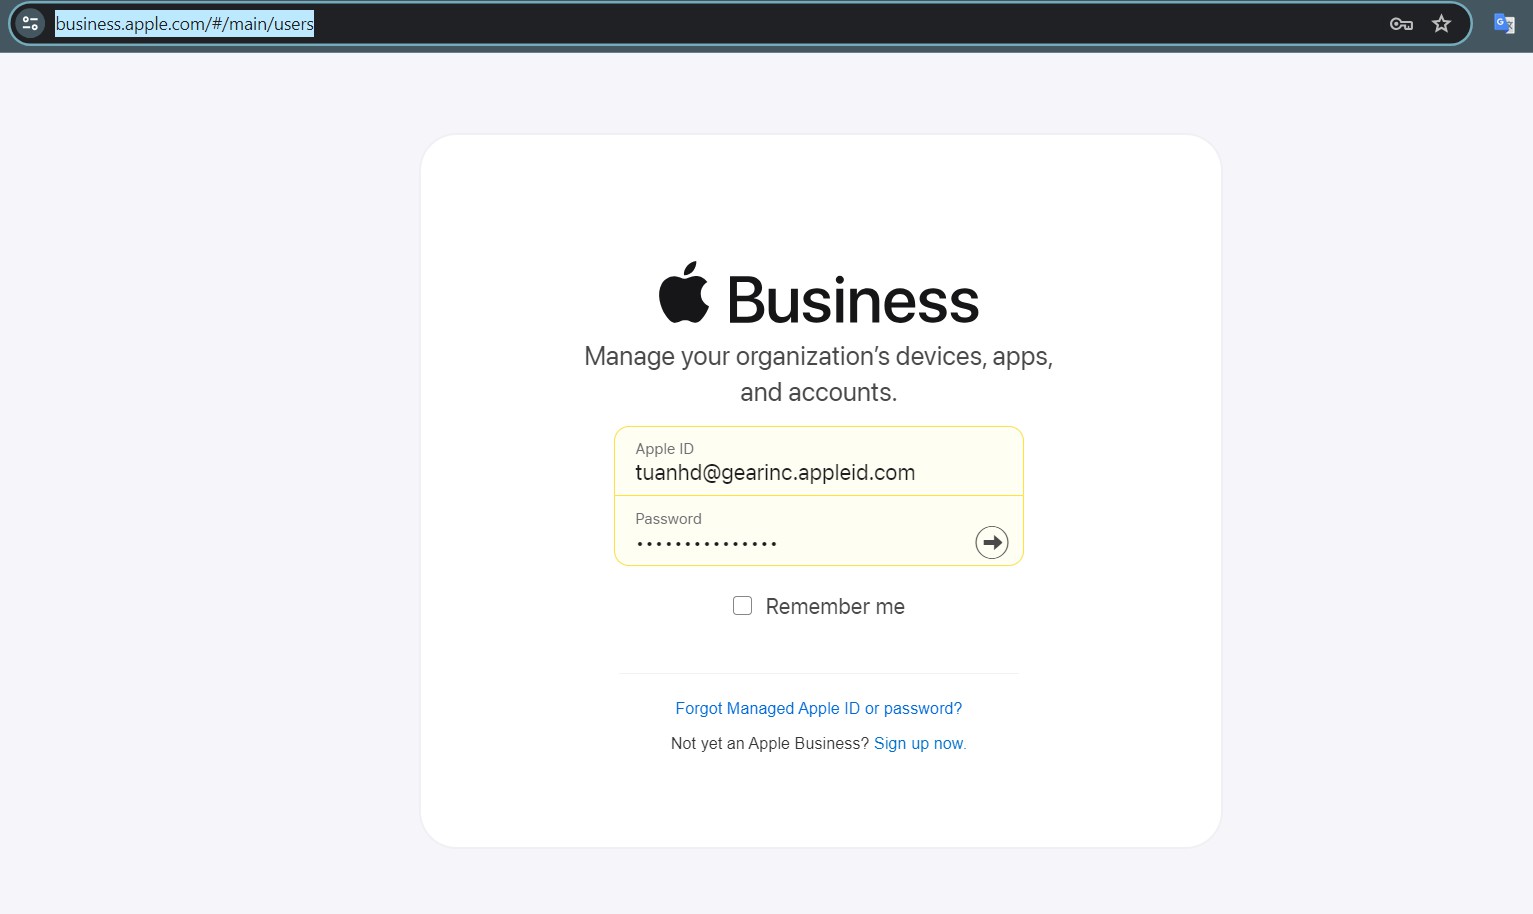
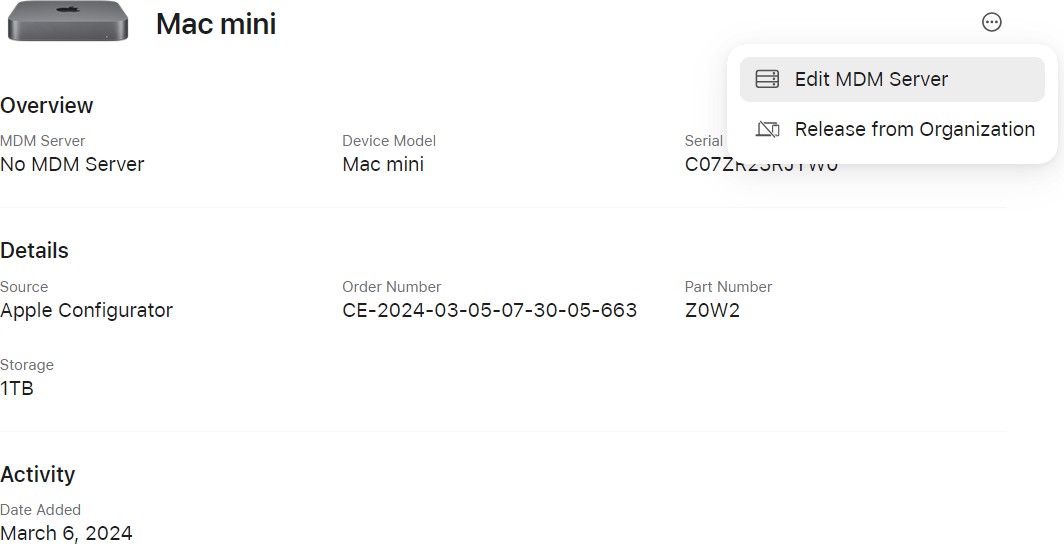
Select the correct device that was just added to the Apple Business Management system. Click Option > Edit MDM SERVER
Select Zone JAMF Click Continue / Confirm to confirm.

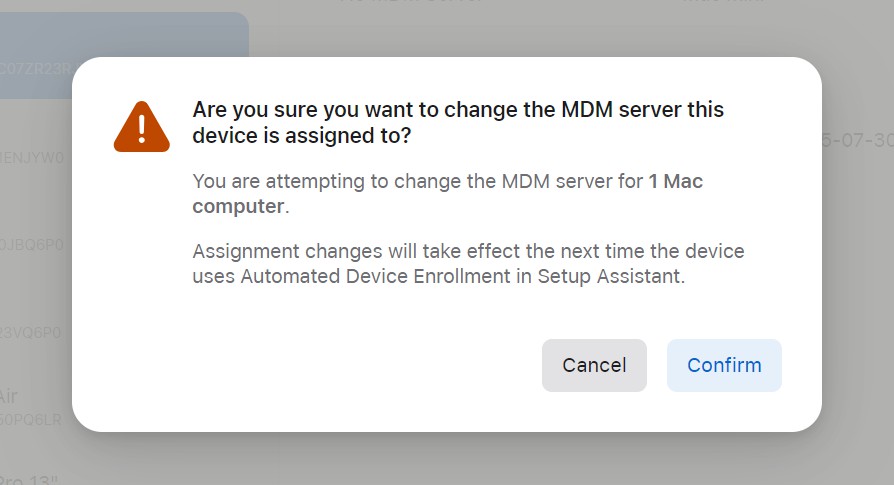
The system will notify you of the successful assignment.
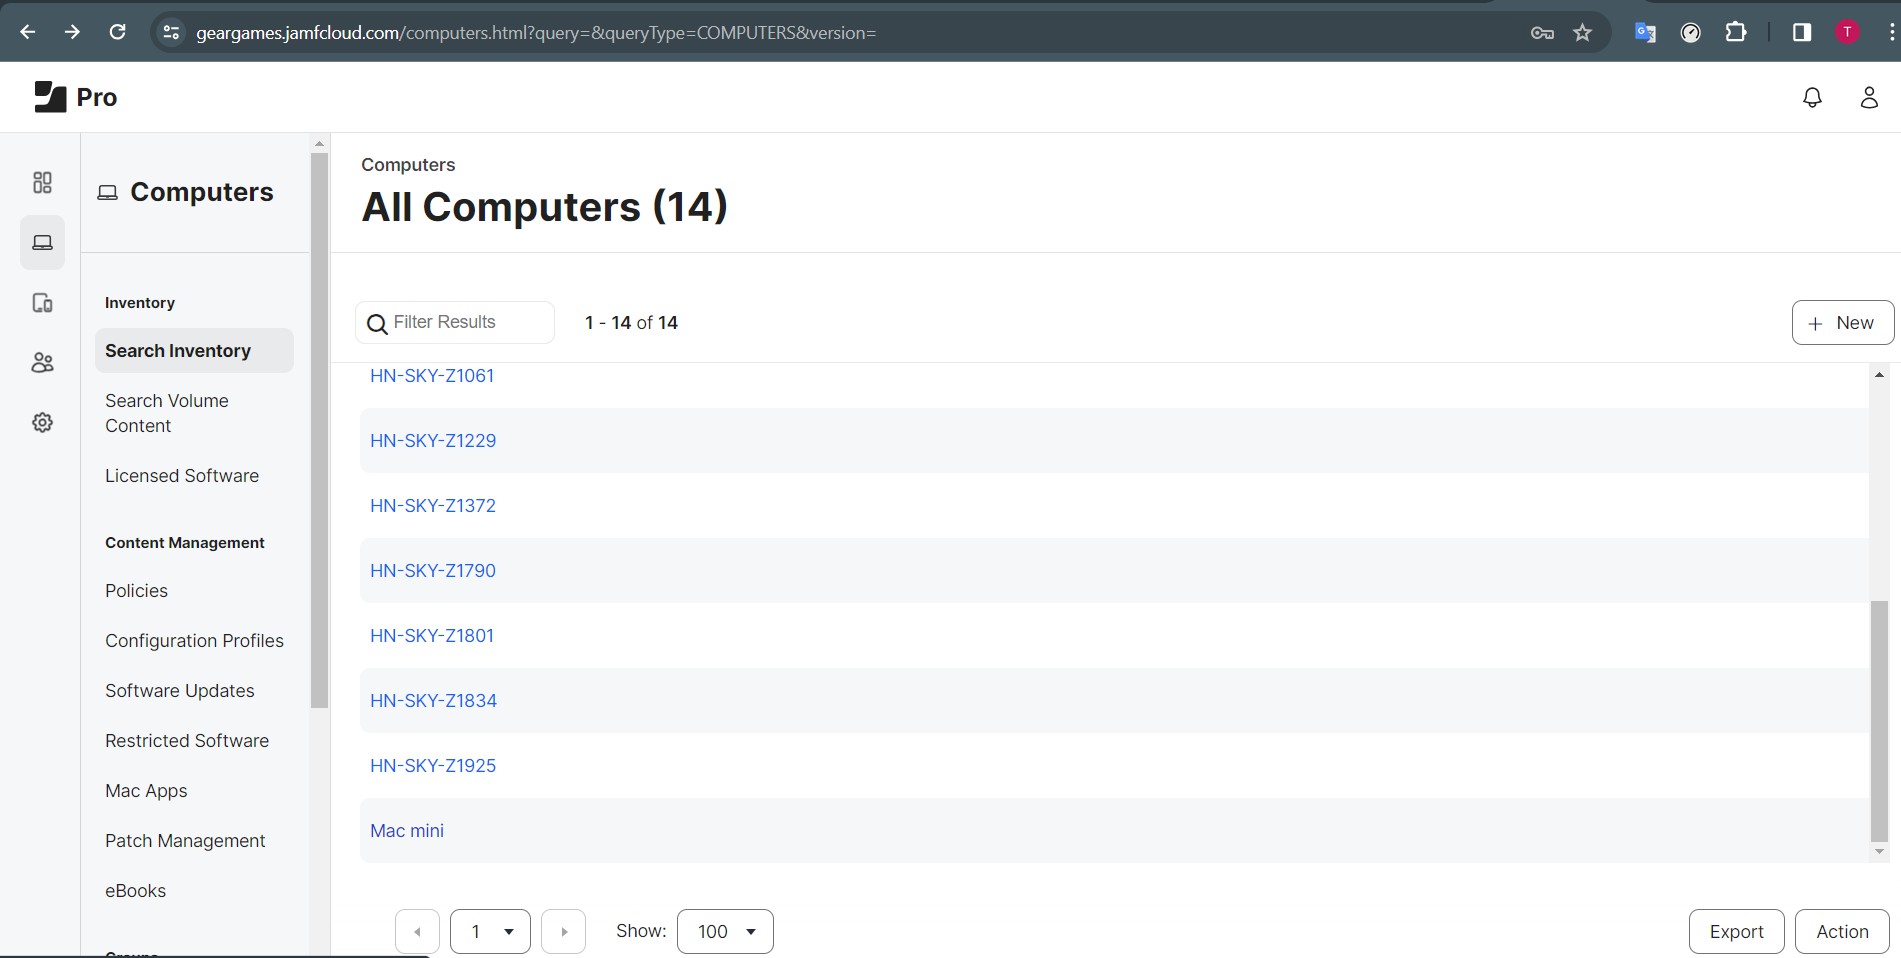
Step 4: Manage the device on Jamf Pro
You need to go to Jamf Pro to check if your device has been added by going to Computers > Search Inventory > All Computers.
Done.