💻 Basic Asset Process
How to Login to the Asset Manager System
-
Open your web browser and go to:
-
Select "Login via SAML" and log in using your company Google account.
I. Process for Recording Assets When Purchased and Received
Receiving the Equipment:
- IT receives the equipment and verifies the quantity and quality from the vendor and GA.
- Transfer the IT equipment to the IT asset management department.
Entering into Snipe-IT:
1. Use the corresponding office-specific sheet:
- Link: Google Sheets
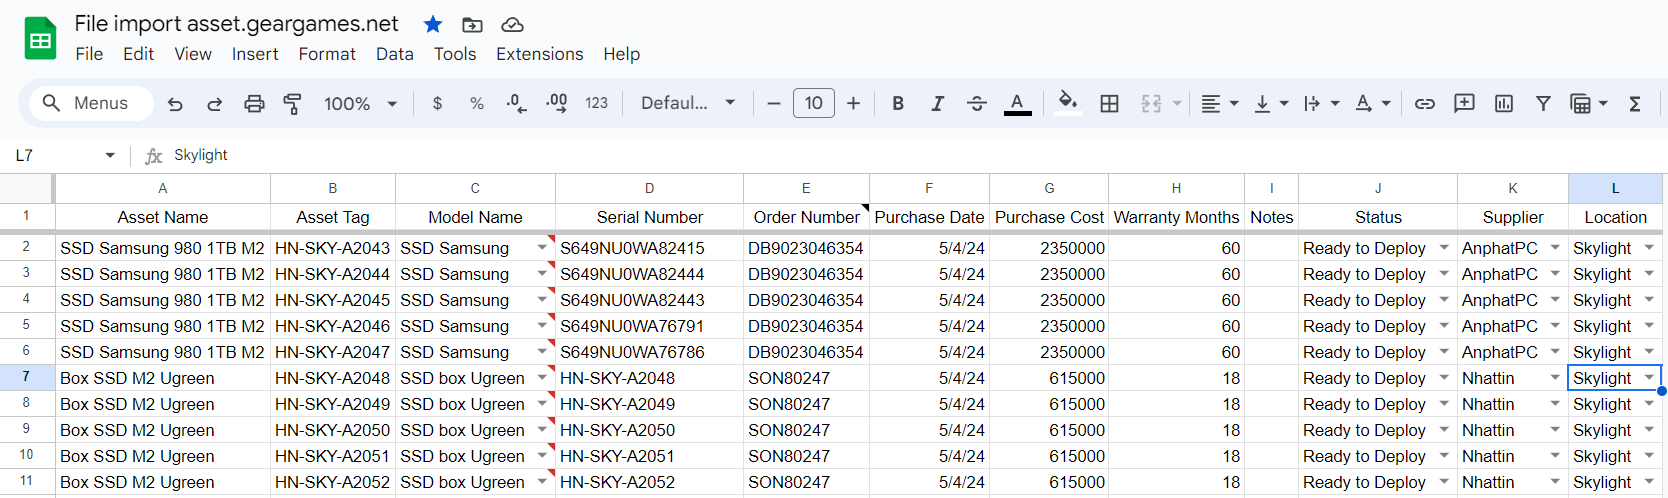
2. Lookup models during data entry and fill all the information as required
- Link: Asset Model
For example:
- Assign an asset tag for each office:
- Each office has a unique asset tag with an increasing number, e.g., HN-SKY-A1234 for Skylight office in Hanoi.
- Purpose: To track the last used sequence number.
- Ensure all previously imported assets are deleted.
- Enter the VAT invoice number related of the product.
- And other column..
Windows: Press Ctrl + ; to quickly insert the current date in the Purchase Date field
Mac : Press command + ; to quickly insert the current date in the Purchase Date field
If you purchase from a new vendor that is not currently on the list, please refer to this guide to create a new vendor.
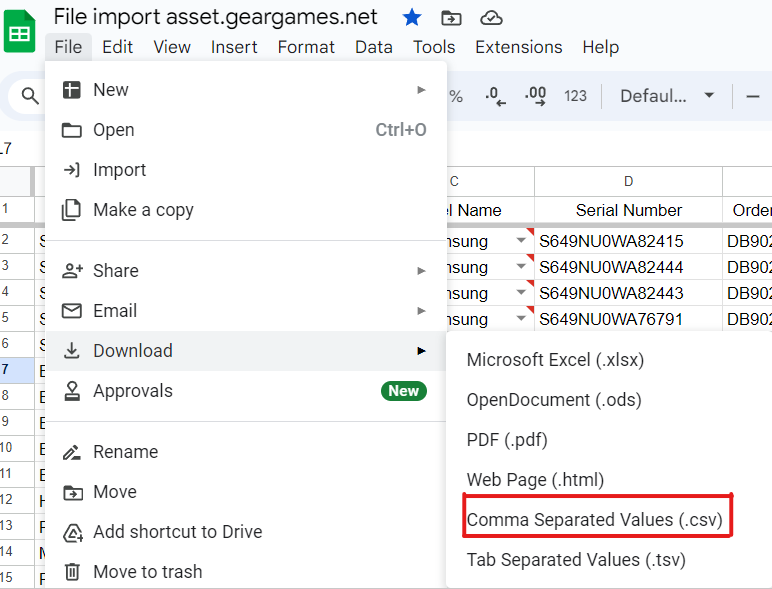
3. After entering all required information, download the file in .csv format:
- Go to the menu File > Download as .csv
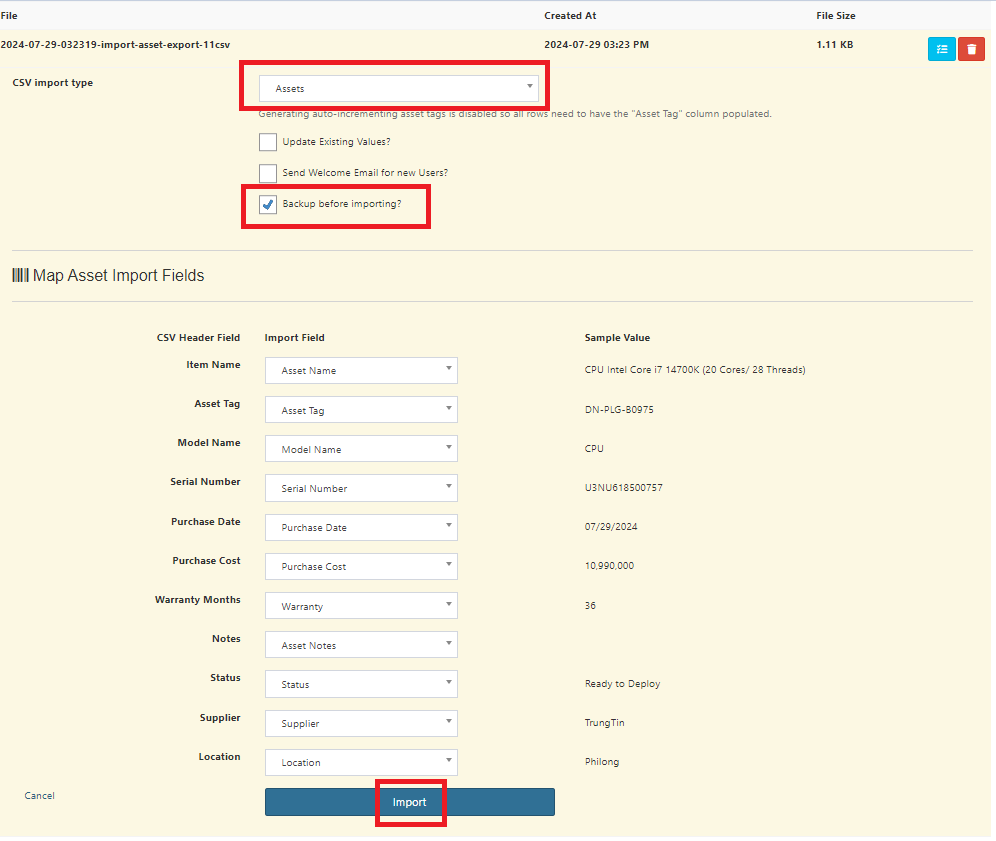
4. Access the Import feature here:
- Link: Import
- CSV import type: Assets and tick Backup before importing? and click Import.
5. Use the Cam Scanner app: iOS, Android
- Capture purchase documents and VAT files to the product.
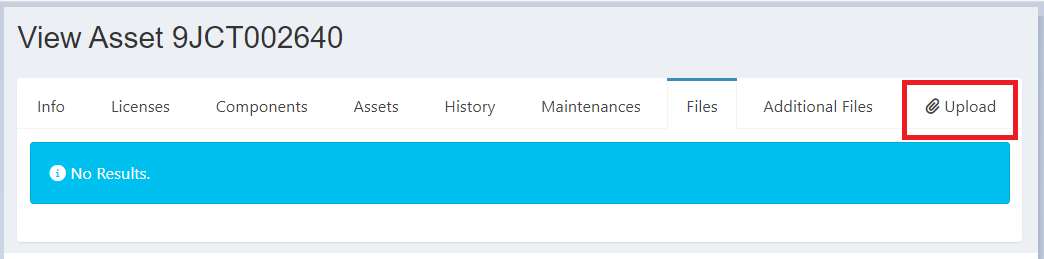
- Access Assets > List all, find the newly imported asset by Asset Tag.
- Go to the Files tab and upload purchase documents and VAT files.
Verification and Storage:
- Verify the entered asset information.
- Store the IT equipment in the warehouse with a designated location tag.
II. Process for Labeling Assets
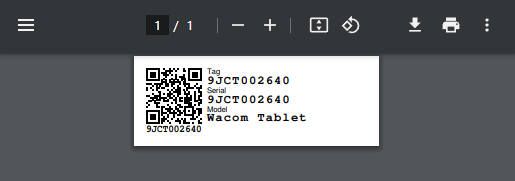
1. For printing individual asset tags
- Go to asset, select List all, and find the product you want to tag.
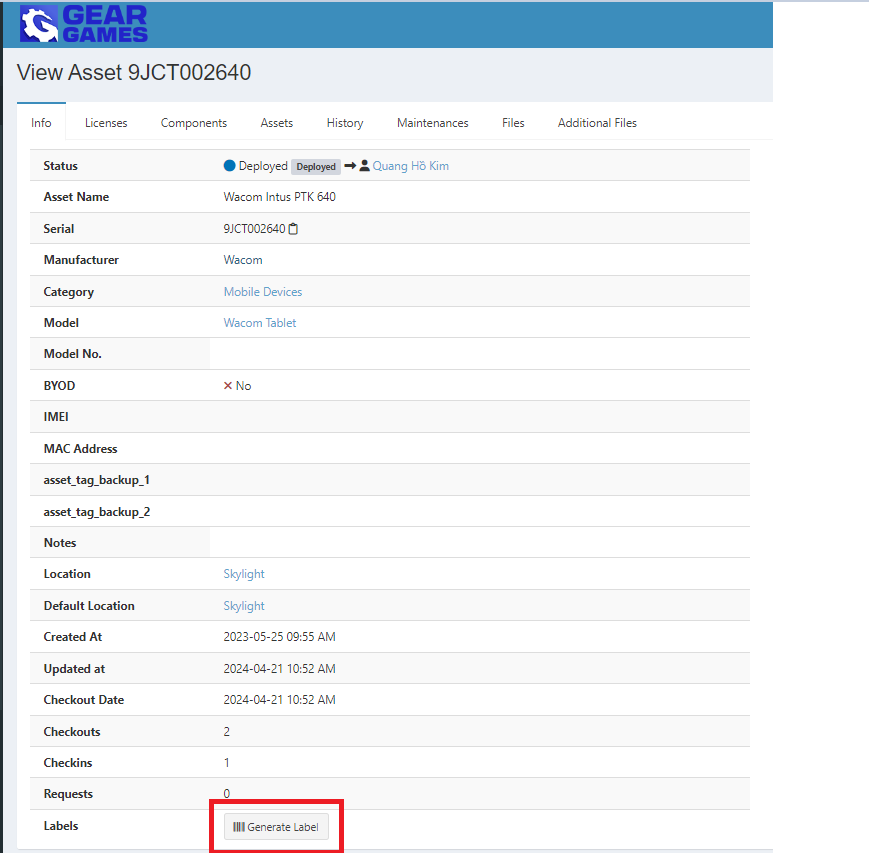
- Click Generate Label, select the appropriate label printer, and print.
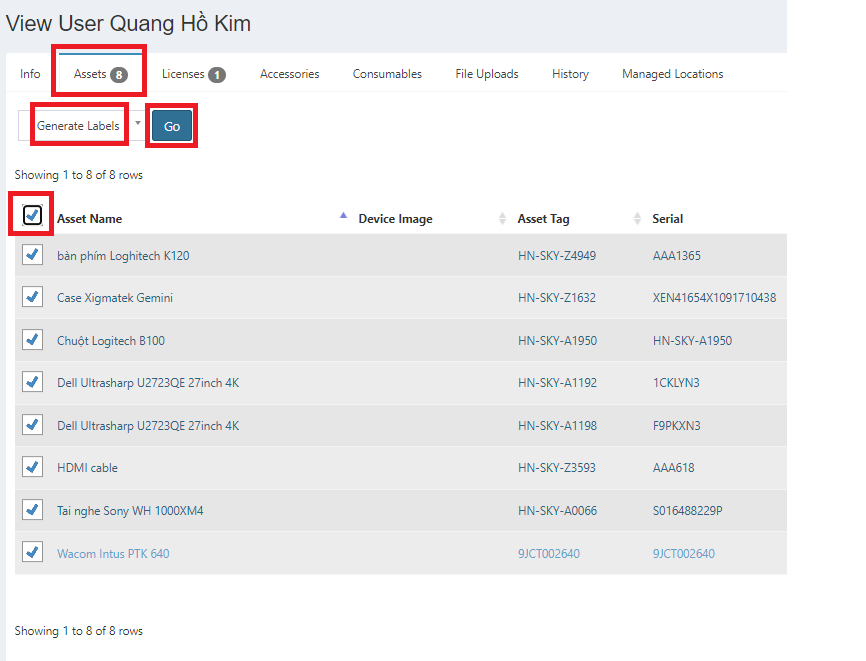
2. For printing multiple tags for multiple products for one employee
- Go to People, find the employee's name.
- Go to the asset tab, select all, choose Generate Label, and click Go.
- Select the label printer and start printing.
III. Process for Checking Out Equipment to Employees (Onboarding, Replacement, Upgrade)
Receiving the Request:
- Receive the request from the employee via the request system or email/slack.
- Confirm the request with HR/leader/director and verify its validity.
Preparing the IT Equipment:
- Check inventory in Snipe-IT.
- Select suitable IT equipment based on the request and verify its working condition.
Check Out IT Equipment:
- Choose Bulk check out at:
- Link: Bulk Checkout
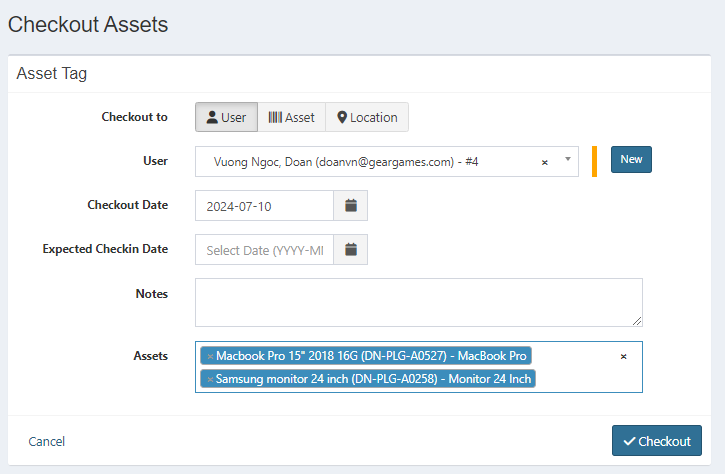
- In the user field, type the employee's name or the corresponding room.
If you cannot find the desired user when onboarding a new employee, it might be because the employee's account has not yet been synced from Google to the Asset Manager system. In this case, please contact DoanVN for prompt assistance
-
Select the check-out date.
-
If this is a loan, select the expected check-in date.
-
Select the assets to be transferred to the employee.
-
Click Check out.
Special Cases
Applicable to computer-related products, including computer components
- Examples: additional hard drives or RAM for upgrading laptops and desktops.
- Computer components that make up a desktop computer.
Process
- Check out into the asset as Case (for Desktops) or Laptop (for upgrading laptops with RAM or SSD).
- Then check out the Case (Desktop) and Laptop to the asset user.
- Meeting rooms and server rooms are considered as individual users.
- The check out/check in procedure is the same as for a person.
IV. Process for Checking In Equipment from Employees (Offboarding, Replacement, Upgrade)
Receiving the Request:
- Receive the check-in request from the employee via the request system or email.
- Confirm the request with HR/leader/director and verify its validity.
Retrieving the IT Equipment:
- Notify and guide the employee on how to return the IT equipment.
- Receive the IT equipment and verify its working condition.
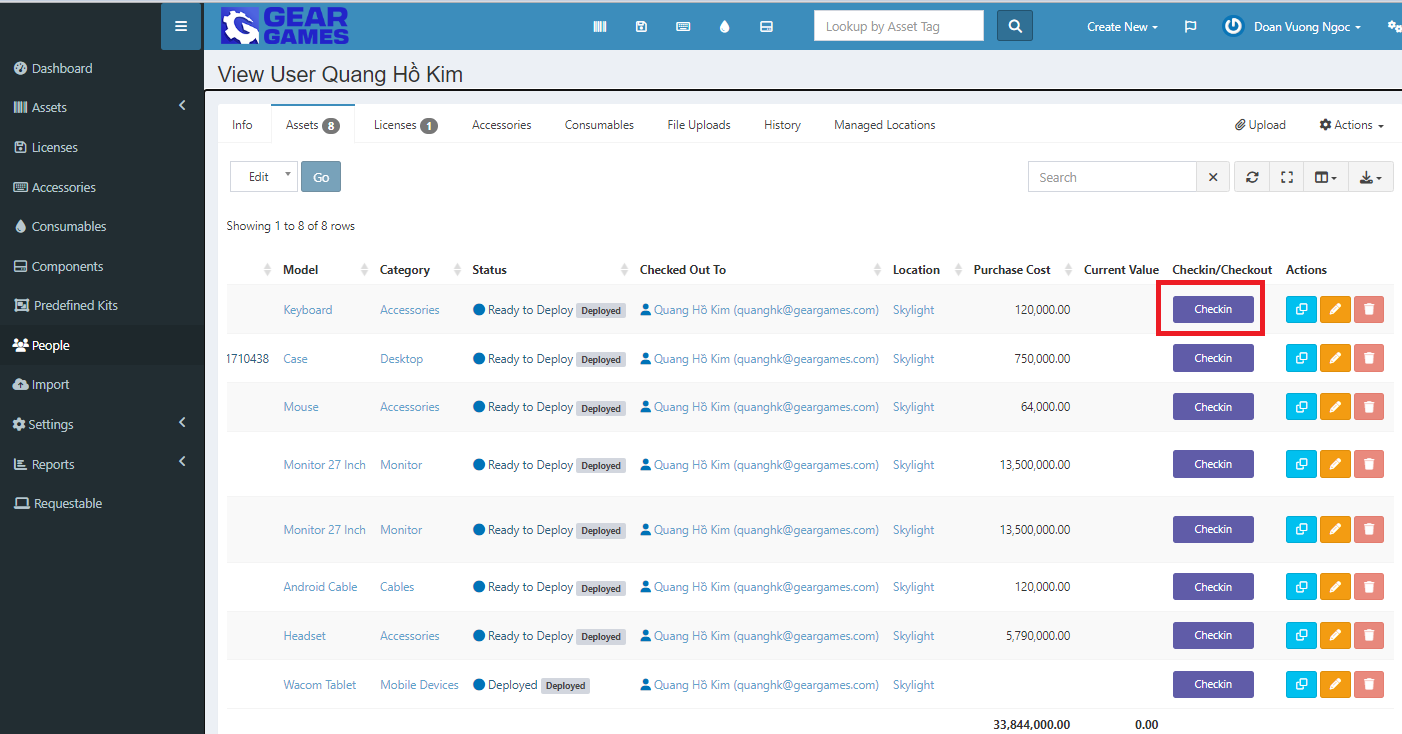
Check In IT Equipment:
- Access the link to check in items to the warehouse:
- Link: Quick Scan Check In

Alternative Method
- Access People, find the desired employee.

- Select the asset tab and check in the desired items.